Tatting | Penelope Book 1

Tatting
Penelope
Book No. 1
No Original Copyright
Patterns Included:
The Art of Tatting
A tatting shuttle about 3 ins. in length is generally used and a fine steel crochet hook for joining picots together.
PREPARATION.—The tatting shuttle has to be first wound with thread. Fasten the end of the thread with a knot to the center bobbin of the shuttle and wind evenly around this center until the shuttle is a little more than half full.
METHOD OF WORKING.—Have about 18 ins. of thread hanging from the bobbin, grip the flat sides of the shuttle between thumb and forefinger of right hand and let the thread pass under the first three fingers and over the little one. With the left hand take the end of the thread between the thumb and first finger and take it back over all fingers to encircle them tautly: cross this thread over the end holding it there firmly between the first finger and thumb (Diagram 1), holding up the second finger to keep the circle open.

The main tatting stitch is referred to as “double stitch” and it is worked in two parts. The first is as follows:—
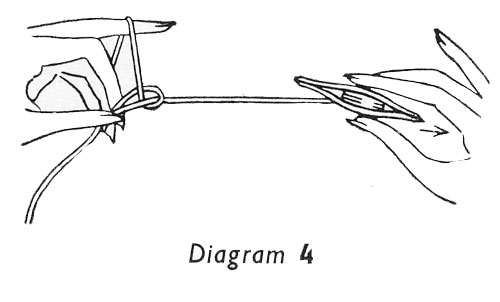
Hold the thread and shuttle as just explained, slip the shuttle through the circle of thread held in the left hand (Diagram 2) and without turning the shuttle, bring it back over this thread and under the thread stretching from the left thumb and first finger to the little finger of right hand (Diagram 3). Drop the second finger of left hand and tightly stretch the shuttle thread (Diagram 4). Keeping this thread taut raise the center finger of the left hand, slide the stitch now made along the stretched shuttle thread and hold it between first finger and thumb of left hand. The point to note here is that this and all following stitches must slide easily along the shuttle thread and when the latter is pulled smartly and tightly the looped stitch is transferred from the shuttle thread to the other. Also it must therefore be possible to stretch and close the ring of thread held in the left hand just by extending and dropping the free fingers.
Coleslaw is the perfect summertime side dish. Made primarily from shredded cabbage with buttermilk or mayonnaise dressing, it is simply delicious.
Coleslaw is so versatile you can make hundreds of varieties by simply adding fresh fruits, vegetables and spices. It is a great companion for just about any dish including barbecue, fish, burgers, hot dogs, chicken and steak.
This recipe is a little different than a standard slaw as it calls for vinegar and mustard as well as scallions. The first time our family made this, we were worried it might have too much tang for our taste buds but it was delicious. We’ve since starting serving it more than our old fashion sweeter version.

The second half of the stitch is made as follows:—
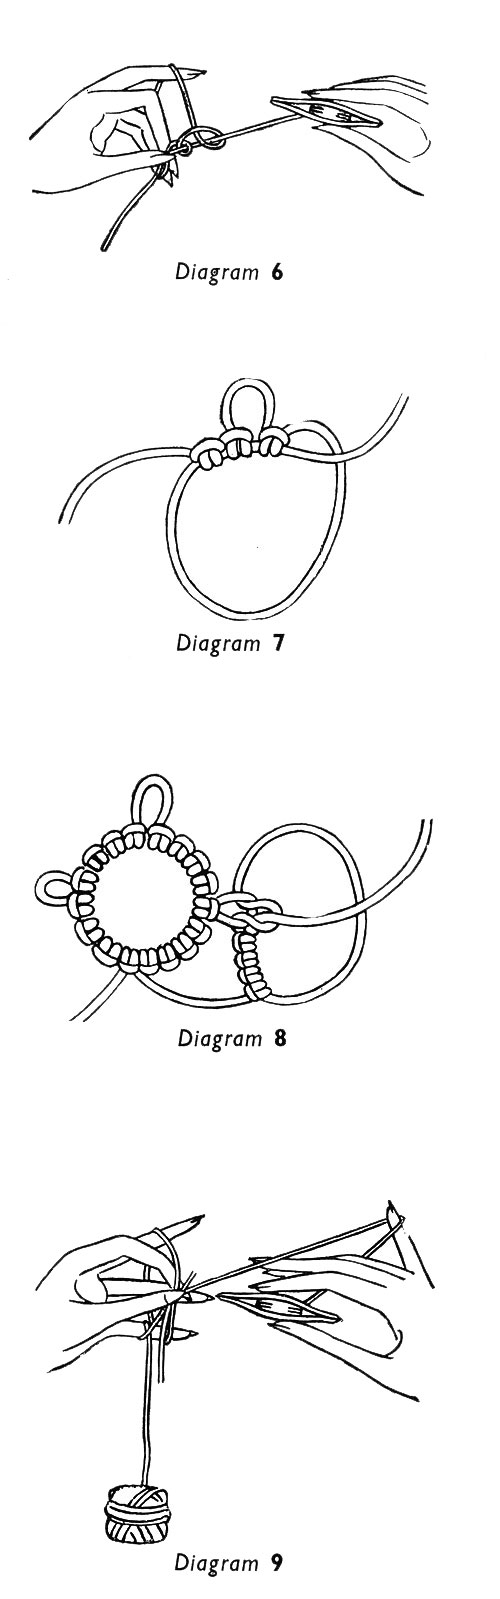
Pass the shuttle over the thread between the first finger and middle finger of left hand (Diagram 5) and return it towards you under the same thread and under the thread stretched from the left thumb and first finger. Drop center finger of left hand and complete stitch in the same manner as explained previously (Diagram 6). The stitch is now complete.
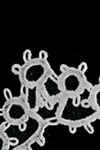
RINGS.—Make a loop as previously explained and on it work about 12 double stitches. Take off the fingers and draw the loop up into a ring completely covered by double stitches.
Make another loop on the fingers and grip this where the threads cross close to the top of the ring just made. Again work 12 double stitches on it and pull up to form a ring.
Continue with rings joined by a single thread for length required.
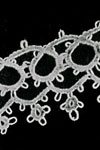
PICOTS.—These are loops between stitches and are purely decorative or they are used as an additional link between rings, etc. To make one leave a small space between the half of one double stitch and the first half of the next. When the stitches are drawn up together the picot is formed automatically (Diagram 7). To join picots insert a fine crochet hook in a picot of a completed ring, etc., take up thread on left hand and pull through the picot. Through the loop now formed pass the shuttle and tighten to close up (Diagram 8).
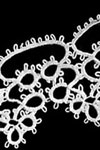
USING TWO THREADS.—Most tatting patterns are worked with two threads, one wound on a shuttle in the usual way and one from a ball. This method is used when rings or scallops are not to be joined at the base by a thread or when it is desired to hide the thread connecting one group of stitches to another. Usually the rings are only made with the shuttle thread, and chains where these occur, are made with the shuttle on the ball thread. When working in this way tie the thread ends of ball and shuttle together.
The following is an example of how the two threads are used in conjunction:—
Make a ring with the shuttle thread as previously explained working for example 12 double stitches. Reverse this, that means turn it over bottom side up, having the two ends of thread at the top and the shuttle thread still to the right.
Take the thread of the ball place the end behind the ring between the thumb and forefinger of left hand and pass a length of the ball thread in a loop round the fingers, twisting it round the third finger or little finger (as most comfortable) of left hand to steady the loop (Diagram 9). Use the shuttle and form 6 double stitches with the second thread, this now being the loop thread. Now reverse the work, make a loop on the fingers with the shuttle thread, taking care to get the first stitch close to the stitches worked with the second thread and make another ring. Again reverse the work, loop the second thread round the fingers and work another bar of 6 double stitches. Repeat to length required.
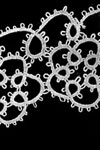
Sometimes two shuttles are used instead of a ball and shuttle and the thread of one shuttle is used as a foundation or shuttle thread and the thread on the other as a loop thread, but the former thread cannot be pulled up like an ordinary loop to form a ring so that it is necessary to draw together first and last stitches of loop and join by a small loop formed like a picot.