Free Crochet Patterns
 Basic Tips Beginner Crocheters Must Know To Pull Off A Beautiful Piece Of Art
The art of crochet is not just for grandmas and great-grandmas. Today, the art of crocheting is for any person who has a fertile imagination, is creative and is very patient. When first looking at them, free crochet patterns may look confusing and difficult to do. However, in time, it becomes easy and second-nature to do. In fact, if you’re looking for a unique Christmas or birthday gift, crochet projects are wonderful to give. Plus, they can be quite useful for your own home.
There are literally thousands of crochet patterns on the Internet; some geared toward beginners while others are geared to advanced crocheters. That way you can get these patterns is to browse the ‘Net and locate the sites they are on.
What You Should Know Before You Begin Crocheting
Now, you need to make sure that you flip or turn the project after every row is done to ensure the yarn doesn’t coil or intertwine. For example, turn the project clockwise after you’ve made an even numbered row and then turn the project counterclockwise once you’ve done an odd-numbered line.
Your tapestry needle will end into the project once you are done. This kind of needle is great for weaving yarn. A number 16 tapestry needle is typically used for plastic canvas basting, which is a worthwhile item to control worsted weight yarn crochet patterns. When you intertwine its loose ends, be sure you interlace two inches in one direction and two inches the other direction.
Six Basic Pieces Of Information You Must Have To Understand Your Free Crochet Patterns
 1 – Chain Stitch
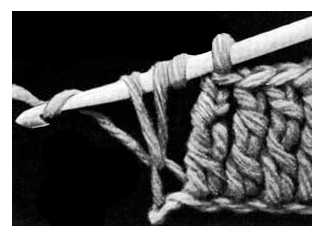
To create a chain stitch, you must make a “slip knot”. Now, pass the hook below the yarn, pulling it through and catching it with the hook. Bring the yarn back into the loop that’s on the hook to create your first chain. When you’re passing the hook underneath the yarn, you’re doing a yarn over”. Be sure to repeat this as many times as the pattern calls for.
2 – Slip Stitch
This kind of stitch is typically used to join rounds of crochet together. There is no tallness to it and cannot be designed into rows. Place the hook into the chain, yarn over and draw a loop by-passing the chain. Next, have the new loop go past the old one.
If you’re going to practice this stitch, you’ll need to create 15 chain stitches. Place the hook into the second chain from the yarn over hook and draw a loop through the “chain”. Be sure you yarn over once again and put the new loop into the two loops on the hook. For every chain row created, grind through a single crochet at the row’s end and turn.
4 – Half Double Crochet Stitch
For practice, make 15 chain stitches. Yarn over your hook just one time. Now, place the hook in the third chain away from the hook. Yarn over and draw a loop that goes through the chain two times. Yarn over once more and draw through the three loops on the hook, which will make a half double crochet in every chain stitch. Create two chain stitches and flip it over.
To do a double crochet stitch, be sure you yarn over, hooking just once and insert it into the fourth chain from the hook. Yarn over and bring the yarn through two loops. Yarn over again and bring it through two remaining loops on your hook. You make a double crochet stitch in every single chain stitch, and when it’s done, you create three chain stitches and turn it. Now, create a double crochet stitch in every stitch across.
Begin practicing this stitch by creating 15 chain stitch. Yarn over the hook two times and place hook into the fifth chain from it. Yarn over and, on the hook, go through two loops. Do this a couple of more times.
How To Check The Pattern Measurement
How can you check a pattern’s measurements? You’ll need to stitch an example before you start on the project. This typically goes 15 rows high and 20 stitches across. It’s then calculated from the inside rows that is the project’s main part. Once you do this, compare the measurements on your free crochet patterns.
If your sample is too large, you’ll need a smaller hook. Repeat the steps above to try again. Now, if your sample is too small, you’ll need a larger hook size. Again, repeat the steps.
Just remember to practice and, before you know it, you’ll be able to do these with no problems.


